Pillar Guide
Google Play Closed Testing: The Complete Pillar Guide (2025)
July 1, 2025 · 16 min read
By the TesterBee Team, built by developers who have been through Google Play Closed Testing requirements
Google Play’s Closed Testing requirement stops more first-time developers than any other policy: 12 real testers must actively use your app for 14 consecutive days before you can publish to production. The rule is straightforward on paper. In practice, it is the single biggest hurdle between a finished app and the Play Store.
Through TesterBee, we have watched over 1,200 developers attempt this process. The ones who succeed on their first try do not just recruit 12 people and wait — they set up their track correctly, monitor engagement daily, collect feedback systematically, deploy updates based on that feedback, and document everything for the production access questionnaire.
This pillar guide covers the entire workflow. Each section links to deeper guides on specific topics.
Table of Contents
- What Is Google Play Closed Testing?
- Why Google Introduced the 12-Tester Requirement
- Who Is Affected?
- Prerequisites: What You Need Before Starting
- Setting Up Closed Testing in Google Play Console
- How to Recruit 12 Testers
- The 14-Day Period: Day-by-Day
- How to Monitor Tester Engagement
- Collecting and Acting on Feedback
- Production Access: How to Get Approved
- Common Reasons for Rejection
- After Approval: What Changes
- Cost Breakdown
- Frequently Asked Questions
What Is Google Play Closed Testing?
Closed Testing is one of three testing tracks available in Google Play Console, alongside Internal Testing and Open Testing. It lets you distribute a pre-release version of your app to a limited group of testers who access it through an opt-in link or email invitation.
The key distinction from Internal Testing: Closed Testing is designed for external users, not your development team. Internal Testing is for your QA engineers and product managers. Closed Testing is for real people outside your organization who represent your future users.
Since November 2023, Google mandates that all new personal developer accounts complete a 14-day Closed Testing period with at least 12 active testers before any app reaches production.
For a detailed comparison of all three testing tracks, read our Internal vs Closed vs Open Testing guide.
Why Google Introduced the 12-Tester Requirement
Before November 2023, new developers could publish apps with minimal quality checks. The Play Store saw a flood of low-quality apps, spam, and outright scams — apps that crashed on launch, apps that were reskins of templates, apps that existed only to serve ads or collect data.
Google introduced the 12-tester, 14-day requirement to:
- Verify real-world testing: Apps must be used by actual people on actual devices before reaching the public. A developer testing on their own phone or an emulator does not catch the issues that 12 different people on 12 different devices will find.
- Collect feedback before production: Bug reports, usability issues, and crash data from real users let developers fix problems before the app reaches a wider audience.
- Deter spam and low-effort submissions: The requirement adds friction to publishing. Bad actors who mass-publish low-effort apps are less likely to recruit and maintain 12 testers for two weeks.
- Raise overall Play Store quality: Better-tested apps mean fewer crashes, fewer scams, and a better experience for Play Store users — which benefits every legitimate developer.
The policy is enforced through both automated systems and human review. Google checks IP diversity, device fingerprints, session durations, and feature usage patterns. Surface-level compliance (12 installs, no engagement) is the single most common reason for rejection.
Who Is Affected?
The Closed Testing requirement applies to:
- All new personal developer accounts created after November 13, 2023
- Existing personal accounts that have never published a production app (even if the account was created before November 2023)
Currently exempt:
- Verified organization developer accounts
- Personal accounts that published at least one production app before November 2023
To check your account type: Google Play Console > Settings > Developer account > Account details. If “Account type” shows “Personal” and you have never published to production, the requirement applies to you.
Once you complete Closed Testing and receive production access, you do not need to repeat the process for subsequent apps. The requirement is account-level, not per-app.
Prerequisites: What You Need Before Starting
Before creating your Closed Testing track, have these ready:
-
Google Play Console account: $25 one-time registration fee. Identity verification required, which can take 1-2 days.
-
Android App Bundle (.aab): Your app built and signed with a release keystore. Debug-signed builds are rejected at upload. For a step-by-step walkthrough, see our upload AAB guide.
-
Store listing: App name, short description, full description, screenshots (minimum 2), hi-res icon (512x512), feature graphic (1024x500). The listing does not need to be final, but it must comply with Google’s policies.
-
Privacy policy URL: A publicly accessible privacy policy page. Your app and store listing must link to it. Missing privacy policy is a common review rejection.
-
Analytics SDK integrated: Firebase Analytics (free) or similar. You need engagement data to monitor testers and answer the production access questionnaire.
-
Communication channel: Discord server, WhatsApp group, or email thread for daily tester check-ins and feedback collection.
-
14-15 testers recruited: Not 12. Build in a buffer before you start the clock. Verify each tester has a physical Android device and a unique Google account.
For a comprehensive pre-launch checklist, see our Closed Testing checklist.
Setting Up Closed Testing in Google Play Console

Follow these steps in order. Skipping the country availability step (step 4) is the mistake we see most often — your testers will see “app not available in your country” and never get started.
-
Navigate to Testing: In Google Play Console, go to Testing > Closed Testing in the left sidebar.
-
Create a track: Click “Create track.” Name it something recognizable (e.g., “Beta 1.0” or “Closed Test v1”). This name is only visible to you in the Console.
-
Upload your app bundle: Upload your Android App Bundle (.aab). The build must be signed with a release keystore — debug-signed builds are rejected at upload. If you are using Android App Bundle signing, Google manages the signing key after upload.
-
Set country availability: Under “Manage track” > “Countries / regions,” ensure the countries where your testers live are selected. If a tester’s country is not listed, they cannot access the app even with a valid opt-in link. This is the single most common setup mistake.
-
Configure tester access: Choose your tester management method. “Email list” is simplest for first-time setups: you provide the opt-in URL to testers directly. “Google Groups” works if you prefer managing a single group email. Both methods work; email list with opt-in link requires less upfront configuration.
-
Generate and share the opt-in link: Once saved, Google produces a unique opt-in URL. Testers click this link, opt in through their Google account, and install your app from the Play Store like any other app.
-
Start the rollout: Click “Start rollout” to make the track live. Google reviews your app (typically a few hours). The 14-day clock begins when your track reaches “Available” status — not when you upload the bundle or create the track.
For a detailed walkthrough of every Play Console setting that affects Closed Testing, see our Console settings guide.
How to Recruit 12 Testers
Finding 12 people who will use your app daily for two weeks is harder than most developers expect. Here are your options, ordered by reliability.
Option 1: Paid Testing Service (Highest Reliability)
Services like TesterBee provide 12 verified testers on real Android devices, matched within 24 hours. Testers are geographically distributed across 80+ countries, eliminating IP clustering and device homogeneity issues. Daily engagement is monitored. A production access guarantee means a full refund if Google rejects due to tester issues.
Cost: $14.99 one-time. Timeline: testers matched within 24 hours.
Option 2: Developer Communities (Medium Reliability)
Subreddits like r/AndroidDev and r/TestMyApp, plus Discord servers (AndroidDev, The Programmer’s Hangout), have users willing to test apps. Expect 60-80% dropout — recruit 25+ to end up with 12. Risk: tester-sharing rings that Google may flag.
Option 3: Friends and Family (Low Reliability)
Friends install once and forget by day 3. Use only as a supplement (3-4 people), never as your primary strategy. Multiple people on the same home Wi-Fi share one external IP — Google flags this.
Option 4: Tester Exchange Groups (Medium Reliability)
Telegram, WhatsApp, and Facebook groups where developers trade testing slots. Risk: reciprocal patterns are detectable. Limit exchange testers to 4-6 of your group.
Recommended: Hybrid Approach
4-6 testers from friends/family (free, buffer) + 4-6 from communities (free, managed) + 4-6 from a paid service (guaranteed engagement baseline). Total: 12-18 testers.
For detailed recruitment templates, community links, and engagement management tactics, see our tester recruitment guide.
The 14-Day Period: Day-by-Day
The 14 days are calendar days, not business days. Weekends and holidays count. There is no way to accelerate this — even 100 testers cannot shorten the 14-day minimum.
Days 1-3: Onboarding
Testers opt in, install, and explore. Expect 80-90% of testers to install within the first 48 hours. Any tester who has not installed by day 3 probably will not — have a backup ready. Send a “welcome” message in your communication channel with clear expectations: daily use, which features to try, how to report issues.
Days 4-10: Active Testing
This is where Google’s engagement monitoring matters most. Testers should open the app daily and use core features. A single install with no subsequent opens is the most common red flag. Monitor engagement daily — if someone has been silent for 48 hours, check in. If still silent, replace them.
Deploy your first update by day 6. It does not need to be major — even a minor bug fix based on feedback demonstrates iterative development. A second update by day 10 is even stronger.
Days 11-14: Wind-Down and Preparation
Engagement naturally dips. This is normal. What matters is that your testers showed consistent activity during days 4-10. Shift focus to preparing your production access application:
- Compile feedback screenshots with timestamps and device info
- Write your changelog: date, version, what changed, which feedback prompted it
- Screenshot Play Console Statistics showing installs, crash rates, and uninstalls
- Draft your questionnaire answers while details are fresh
- Send thank-you messages to testers
Day 15-16: Apply
Wait until day 15 or 16 before applying to ensure all engagement data has synced. Submit your application with complete questionnaire answers and supporting evidence. Most decisions arrive in 1-3 business days.
Critical rule throughout: If you fall below 12 engaged testers at any point, you risk rejection. Start with 14-15 testers as a buffer. Replace inactive testers within 48 hours.
For the complete day-by-day plan with specific actions per day, see our 14-day timeline guide.
How to Monitor Tester Engagement
Google Play Console provides limited engagement visibility — install counts and crash rates, but not daily active usage per tester. To track engagement properly:
-
Google Play Console Statistics: Check Testing > Closed Testing > Statistics tab daily for install counts, uninstall events, and crash rates. Uninstalls are a strong negative signal — replace uninstalled testers immediately.
-
Firebase Analytics (or your own analytics): Track daily active users, session duration, screen views, and feature-level events. This gives you the same data Google reviews plus evidence for your production access questionnaire. Set up a real-time dashboard showing DAU over the 14-day period.
-
Direct tester communication: Daily check-in in your Discord/WhatsApp channel: “Day X — did the app open okay? Any issues?” Screenshot responses as documentation. Testers who consistently reply build a paper trail that strengthens your application.
-
Android Vitals: Quality > Android vitals > Overview shows crash rate and ANR rate. Both should stay under 1%. A spike in crashes mid-testing that goes unfixed is a rejection trigger.
Collecting and Acting on Feedback
Google expects evidence that you collected tester feedback and acted on it. This is not optional — it is a core part of what the production access questionnaire asks about.
How to Collect Feedback
Set up a structured channel. A Discord server with a #feedback channel works well. A Google Form sent on day 7 and day 14 works. Daily WhatsApp messages with a specific question (not “any issues?” but “did the search feature return results within 2 seconds?”) produce better feedback.
Ask specific questions:
- “What was the first thing that confused you?”
- “Did anything break or crash?”
- “What feature did you use most? Least?”
- “If you could change one thing, what would it be?”
How to Document Feedback
For each piece of feedback, record:
- Date received
- Tester name (if you have permission)
- Device model and Android version
- Description of the issue or suggestion
- What you did about it (fixed in version X, added to backlog, explained as intended behavior)
- Date the fix was deployed (if applicable)
How to Act on Feedback
Deploy at least one update during the 14-day period addressing feedback. Reference the feedback in your update release notes. When a tester reports a bug and sees it fixed within days, they are more likely to stay engaged — and Google’s review team sees a developer who takes testing seriously.
Production Access: How to Get Approved
After day 14, apply for production access in Google Play Console under “Production access.” Google evaluates four criteria:
- Tester engagement: Did testers open and use the app regularly, or just install it? Daily sessions with feature interaction is the standard.
- Tester authenticity: Were testers real individuals with unique devices, Google accounts, and IP addresses? Shared IPs, emulators, and coordinated patterns trigger rejection.
- Feedback collected and acted on: Did you gather bug reports and usability feedback? Did you deploy at least one update addressing it? Documented feedback with corresponding fixes is the single strongest signal.
- 14-day compliance: Did testing last at least 14 continuous calendar days with 12 or more engaged testers throughout? Any gap in track availability or drop below 12 testers weakens your application.
We cover the production access application in detail — including the questionnaire and example answers that passed review — in our production access guide.
Common Reasons for Rejection
Based on developer reports and our analysis of rejection patterns, these are the most frequent reasons Google denies production access:
- Insufficient tester engagement: Testers installed the app but rarely opened it after day 2. Google tracks session duration and feature interaction, not just installs.
- Suspicious tester patterns: Multiple testers sharing the same IP address, same device model with identical fingerprints, or accounts created on the same day.
- Fewer than 12 active testers: Dropouts pushed the active tester count below 12 during the 14-day window.
- Vague questionnaire answers: One-sentence or generic responses to the production access questionnaire signal that testing was not taken seriously.
- No updates deployed: Submitting zero updates during the 14 days suggests feedback was not collected or acted on.
- Emulator or virtual device detection: Even one tester on an emulator can trigger rejection. This is a zero-tolerance check.
- App policy violations: Review Google’s Developer Program Policies before submitting. A policy violation in your app will block production access regardless of testing quality.
For a detailed breakdown of each rejection reason with specific fixes, see our rejection reasons guide.
After Approval: What Changes
Once production access is granted:
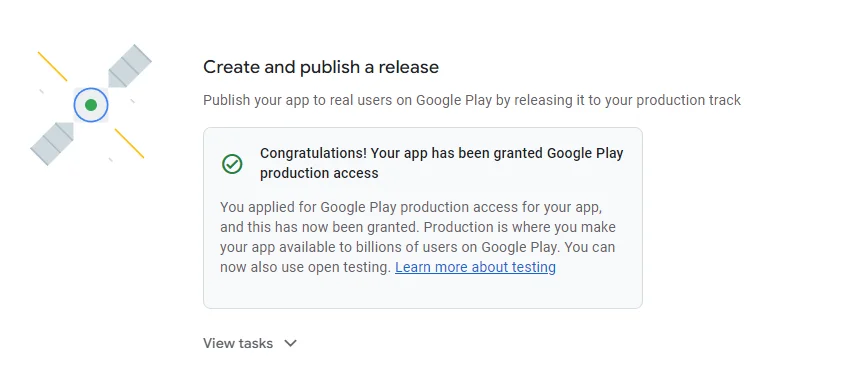
- You can create a production release and publish your app to the Play Store
- Subsequent apps do not require another Closed Testing cycle — the requirement is account-level
- You can still use Closed Testing for future apps voluntarily (recommended for major updates)
- The production release goes through a separate Google review process (typically a few hours)
Cost Breakdown
| Item | Cost |
|---|---|
| Google Play Console account | $25 (one-time) |
| Closed Testing track | Free |
| Tester recruitment (DIY/free) | $0 (high dropout risk) |
| Tester recruitment (TesterBee) | $14.99 (one-time, with guarantee) |
| Total (using paid service) | $39.99 |
The hidden cost of free recruitment is time. Every restart of the 14-day clock costs you two weeks your app could have been live and generating downloads or revenue. At even one restart, the time cost exceeds the $14.99 service fee.
Frequently Asked Questions
How long does Google Play Closed Testing take?
14 calendar days minimum. Plan for 16-18 days total: 1-2 days to set up the track and recruit testers, 14 days of testing, and 1-2 days for Google to review your production access application.
Can I use emulators or virtual devices for Closed Testing?
No. Google detects emulators, virtual machines, and cloud device farms. Testers must use physical Android phones or tablets with unique Google accounts. Using emulated devices will result in rejection.
What happens if a tester drops out during the 14 days?
If you fall below 12 active testers, you risk rejection when you apply for production access. Start with 14-15 testers so that one or two dropouts do not put you below the threshold. Replace inactive testers immediately if you can.
Do organization accounts need Closed Testing?
As of 2025, organization developer accounts are not required to complete Closed Testing before publishing to production. Personal accounts created before November 2023 that have never published an app are also subject to the requirement.
How much does Closed Testing cost?
Google Play Console charges a one-time $25 registration fee. The Closed Testing track itself is free. If you use a paid testing service like TesterBee ($14.99 one-time), add that to your budget. Free methods exist but carry higher dropout risk.
Can I run Closed Testing for multiple apps simultaneously?
Yes. Each app requires its own track with 12 testers. The 14-day periods can overlap. Using the same 12 testers across multiple apps may look like tester-sharing to Google’s fraud detection — use distinct tester groups per app where possible.
What should I write in the production access questionnaire?
Be specific: reference actual feedback, bugs fixed, devices, dates, and version numbers. Generic answers like “We learned a lot” will not pass. Our production access guide includes example answers that passed.
Can I use the same testers for my next app?
Yes — after your account has production access, you do not need another Closed Testing cycle. For voluntary testing of future apps, the same testers are fine — there is no strict requirement.
What if Google takes longer than expected to review my application?
Most reviews complete in 1-3 business days. Up to 7 days is normal. There is no way to expedite. Keep your track active until you receive a decision.
What is the single most important thing to get right?
Starting with 14-15 testers instead of exactly 12. Buffer testers prevent the most common rejection reason — falling below the 12-tester threshold — and cost nothing to recruit when using free methods. Every other issue (engagement dips, uninstalls, unresponsive testers) is manageable if you have a buffer.
Next Steps
If you need testers who stay engaged for the full 14 days, TesterBee provides 12 verified testers on real Android devices, matched within 24 hours, with daily engagement monitoring and a production access guarantee.
For step-by-step guidance on specific parts of this process, explore our detailed guides:
Need 12 testers for your app?
Get 12 verified testers. 14-day engagement guarantee. Complete your Closed Testing requirement with confidence.
Get 12 Testers Now